Difference between revisions of "Enderal:For the Greater Good"
(Add categories & fix main image) |
(Fill page) |
||
| Line 1: | Line 1: | ||
| − | {{Breadcrumb|[[Enderal:Quests|Quests]] | + | {{Breadcrumb|[[Enderal:Quests|Quests]]|[[Enderal:Main Quest|Main Quest]]}} |
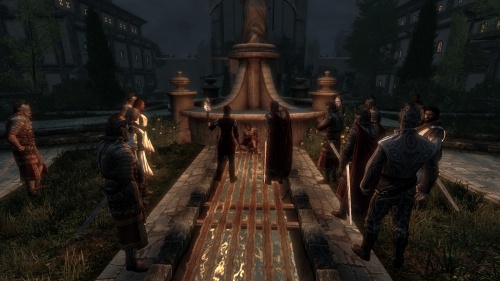
| − | + | [[File:EN-Quest-For the Greater Good 5.jpg|500px|right|thumb|[[Enderal:Grandmaster Tealor Arantheal|Grandmaster Tealor Arantheal]] confronting the traitor.]] | |
| − | [[File:EN- | + | |
{{Quest Header | {{Quest Header | ||
|image = EN-Quest-Ornament-Mainquest-Left.png | |image = EN-Quest-Ornament-Mainquest-Left.png | ||
| − | |quest giver = | + | |quest giver = [[Enderal:Grandmaster Tealor Arantheal|Grandmaster Tealor Arantheal]] |
| − | |prerequisite = | + | |prerequisite = [[Enderal:Forgotten Homeland, Part III|Forgotten Homeland, Part III]] |
| − | |next = | + | |next = [[Enderal:The Shards of Order, Part I|The Shards of Order, Part I]] |
| − | |locations = | + | |locations = [[Enderal:Sun Temple|Sun Temple]] |
| − | | | + | |questid = MQ14 |
| − | | | + | |
}} | }} | ||
| − | |||
| − | |||
| − | |||
| − | |||
| − | |||
==Objectives== | ==Objectives== | ||
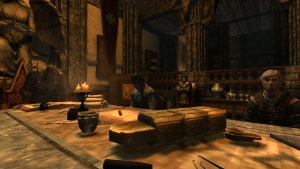
| − | * ( | + | [[File:EN-Quest-For the Greater Good.jpg|300px|right|thumb|The meeting.]] |
| − | * ( | + | * (Optional) Talk with Tealor about his dispute with Natara |
| − | *Wait till the map | + | * (Optional)Attend Magistra Yaela's and Lijam's funeral ceremony |
| − | * Meet | + | * Meet ''(Non-Injured Companion)'' in front of the Emporium |
| − | * Meet | + | * Wait till the starling's map has been decoded |
| − | *Defeat the | + | * (Optional) Meet ''(Injured Companion)'' in the Curarium |
| + | * Go into the Emporium with ''(Non-Injured Companion)'' | ||
| + | * Meet Archmagister Merrâyil at the Beacon | ||
| + | * Defeat the possessed keepers | ||
| + | * Witness the traitor's interrogation | ||
| + | * Attend Tealor Arantheal's speech | ||
| + | * Meet Tealor Arantheal in the tower room of the Emporium | ||
==Journal Entries== | ==Journal Entries== | ||
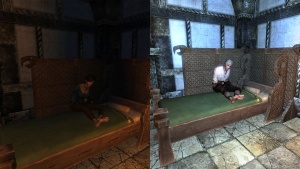
| + | [[File:EN-quests-For the Greater Good2.jpg|300px|right|thumb|The injured companion, resting in the Curarium.]] | ||
| + | ; Initial | ||
| + | : In spite of all the losses we found what we searched for in the Star City - a trace to the Numinos, the consciousness of a High One. If Magistra Yeala's theory is right we should be able to find one of those in the City of a Thousand Floods where the last Cleansing transpired. We have to travel there and, by using my echo, summon a memory of the last Cleansing - and then use the Word of the Dead on the summoned High One. A risky plan, but the only one we have. Grandmaster Arantheal said that the arcanists will have deciphered the Starling map in a few days. I should use this time to tie loose ends. | ||
| + | ; After the map is deciphered | ||
| + | : In spite of all the losses we found what we searched for in the Star City - a trace to the Numinos, the consciousness of a High One. If Magistra Yeala's theory is right we should be able to find one of those in the City of a Thousand Floods where the last Cleansing transpired. We have to travel there and, by using my echo, summon a memory of the last Cleasning [sic] - and then use the Word of the Dead on the consciousness. A risky plan, but the only one we have. Arantheal will brief us in the Emporium. | ||
| + | ; After the Grandmaster's briefing | ||
| + | : The City of a Thousand Floods is underneath Ark. To get there we need to travel through the tunnels of the Undercity until we find a breach which leads in the lower cavern - this is at least the theory. Grandmaster Arantheal wants me to get the Word of the Dead from Archmagister Merrâyil. | ||
| + | ; After the Nehrimese invasion | ||
| + | : The worst case happened: The Truchessa and around half of the remaining Keepers betrayed us. They let Taranor Coarek's armies into the city, an event which they rewarded in blood. Now everything is up to us - solely the Sun Temple isn't raided by the Nehrimese yet and we have to find a way to search for the Numinos and ignite the Beacon before it is too late. | ||
| + | |||
==Walkthrough== | ==Walkthrough== | ||
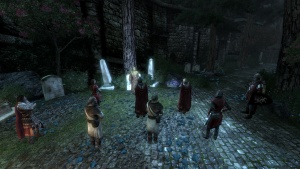
| − | + | [[File:EN-Quest-For the Greater Good 4.jpg|300px|right|thumb|The funeral.]] | |
| − | + | [[File:EN-quests-For_the_Greater_Good3.jpg|300px|right|thumb|The non-injured companion, waiting for you in front of the Emporium.]] | |
| + | This quest will begin automatically at the end of [[Enderal:Forgotten Homeland, Part III|Forgotten Homeland, Part III]]. After the meeting, you will get [[Enderal:Two Souls, Part VI|Two Souls, Part VI]] or [[Enderal:Every Day Like the Last, Part VI|Every Day Like the Last, Part VI]] from your love interest. The companion that you didn't romance will be recovering in the Curarium. | ||
| + | |||
| + | You can attend to Yaela's and Lijam's funeral on Ark's Military Barracks, where a Keeper will rebel and lash out at the priest, questioning how the Light-Born can lead anyone to the Eternal Path if they themselves are dead. The priest will ask for the heckler to be removed, and the optional objective will be completed, giving you 250 EP. | ||
| + | |||
| + | Your injured companion is resting on the Curarium, where you can visit them. This companion will be whomever you chose not to romance or whomever you had the lowest affinity with. Talk to them to learn that they're recovering well, and might even be able to help you on the City of a Thousand Floods. | ||
| + | |||
| + | You can talk with [[Enderal:Grandmaster Tealor Arantheal|Grandmaster Tealor Arantheal]] to discuss with him [[Enderal:Natara Dal'Veram|Natara Dal'Veram]]'s disbelief in [[Enderal:The Cycle|The Cycle]], despite all that has happened so far. He will explain that she fears losing [[Enderal:The Order|The Order]], the only thing that she has, the thing that she fought for her whole life, as she was not born in the [[Enderal:Path (Holy Calling)#Sublime|Sublime]] path like all the other keepers. | ||
| + | |||
| + | After two days have passed, the map will be decoded, and your non-injured companion will be waiting for you in front of the [[Enderal:Emporium|Emporium]]. '''You have reached the point of no return''': Accepting your companion's dialogue will lead to the final events of Enderal, and you will no longer be able to roam freely or complete any quests during or after that. | ||
| + | |||
| + | Go to the Emporium and [[Enderal:Yuslan Sha'Rim|Yuslan Sha'Rim]] will explain that the City of a Thousand Floods is right beneath Ark itself. The Grandmaster will tell you to get the [[Enderal:Word of the Dead (Item)|Word of the Dead]] and the [[Enderal:Numinos|Numinos]] container from [[Enderal:Archmagister Lexil Merrâyil|Archmagister Lexil Merrâyil]] at the [[Enderal:Beacon|Beacon]], then meet him at the entrance of the [[Enderal:Undercity|Undercity]]. As you arrive at the Beacon however, things start to go wrong. First, a couple of Keepers will become possessed by the High Ones, attacking you. After that, however, something much worse: ''The Nehrimese have breached Ark.'' | ||
| + | |||
| + | [[Enderal:Commander Leora Eren|Commander Leora Eren]] will arrive and explain that the [[Enderal:Natara Dal'Veram|Truchessa]] and a third of the Keepers have followed [[Enderal:Signet Leader Jorek Bartarr|Signet Leader Jorek Bartarr]]'s example, and opened Ark's gates to Coarek. Follow the quest marker towards one of the traitors, and you'll learn that Natara offered Ark in exchange for peace, but Coarek betrayed the Truchessa and killed her as soon as the gates were open. Tealor decides that the only prudent course of action is to light the Beacon before Coarek can reach it and destroy it, then surrender. | ||
| − | + | After Tealor's speech, find him on the Grandmaster's Rooms, in the Emporium, where he will explain that [[Enderal:The Order|The Order]] has a set of hidden tunnels into the Undercity, which would have been used to dispense poisonous gas in case of a revolt. He tells you to meet him and Yuslan there, with your companion. This quest will then end, and [[Enderal:The Shards of Order, Part I|The Shards of Order, Part I]] will begin. | |
| + | [[Category:Enderal]] | ||
[[Category:Enderal-Quests]] | [[Category:Enderal-Quests]] | ||
[[Category:Enderal-Quests-Main Quest]] | [[Category:Enderal-Quests-Main Quest]] | ||
Revision as of 18:08, 20 April 2017

Contents
 |
For the Greater Good (MQ14) |
| Quest Giver: | Grandmaster Tealor Arantheal |
| Location(s): | Sun Temple |
| Prerequisite Quest: | Forgotten Homeland, Part III |
| Next Quest: | The Shards of Order, Part I |
Objectives
- (Optional) Talk with Tealor about his dispute with Natara
- (Optional)Attend Magistra Yaela's and Lijam's funeral ceremony
- Meet (Non-Injured Companion) in front of the Emporium
- Wait till the starling's map has been decoded
- (Optional) Meet (Injured Companion) in the Curarium
- Go into the Emporium with (Non-Injured Companion)
- Meet Archmagister Merrâyil at the Beacon
- Defeat the possessed keepers
- Witness the traitor's interrogation
- Attend Tealor Arantheal's speech
- Meet Tealor Arantheal in the tower room of the Emporium
Journal Entries
- Initial
- In spite of all the losses we found what we searched for in the Star City - a trace to the Numinos, the consciousness of a High One. If Magistra Yeala's theory is right we should be able to find one of those in the City of a Thousand Floods where the last Cleansing transpired. We have to travel there and, by using my echo, summon a memory of the last Cleansing - and then use the Word of the Dead on the summoned High One. A risky plan, but the only one we have. Grandmaster Arantheal said that the arcanists will have deciphered the Starling map in a few days. I should use this time to tie loose ends.
- After the map is deciphered
- In spite of all the losses we found what we searched for in the Star City - a trace to the Numinos, the consciousness of a High One. If Magistra Yeala's theory is right we should be able to find one of those in the City of a Thousand Floods where the last Cleansing transpired. We have to travel there and, by using my echo, summon a memory of the last Cleasning [sic] - and then use the Word of the Dead on the consciousness. A risky plan, but the only one we have. Arantheal will brief us in the Emporium.
- After the Grandmaster's briefing
- The City of a Thousand Floods is underneath Ark. To get there we need to travel through the tunnels of the Undercity until we find a breach which leads in the lower cavern - this is at least the theory. Grandmaster Arantheal wants me to get the Word of the Dead from Archmagister Merrâyil.
- After the Nehrimese invasion
- The worst case happened: The Truchessa and around half of the remaining Keepers betrayed us. They let Taranor Coarek's armies into the city, an event which they rewarded in blood. Now everything is up to us - solely the Sun Temple isn't raided by the Nehrimese yet and we have to find a way to search for the Numinos and ignite the Beacon before it is too late.
Walkthrough
This quest will begin automatically at the end of Forgotten Homeland, Part III. After the meeting, you will get Two Souls, Part VI or Every Day Like the Last, Part VI from your love interest. The companion that you didn't romance will be recovering in the Curarium.
You can attend to Yaela's and Lijam's funeral on Ark's Military Barracks, where a Keeper will rebel and lash out at the priest, questioning how the Light-Born can lead anyone to the Eternal Path if they themselves are dead. The priest will ask for the heckler to be removed, and the optional objective will be completed, giving you 250 EP.
Your injured companion is resting on the Curarium, where you can visit them. This companion will be whomever you chose not to romance or whomever you had the lowest affinity with. Talk to them to learn that they're recovering well, and might even be able to help you on the City of a Thousand Floods.
You can talk with Grandmaster Tealor Arantheal to discuss with him Natara Dal'Veram's disbelief in The Cycle, despite all that has happened so far. He will explain that she fears losing The Order, the only thing that she has, the thing that she fought for her whole life, as she was not born in the Sublime path like all the other keepers.
After two days have passed, the map will be decoded, and your non-injured companion will be waiting for you in front of the Emporium. You have reached the point of no return: Accepting your companion's dialogue will lead to the final events of Enderal, and you will no longer be able to roam freely or complete any quests during or after that.
Go to the Emporium and Yuslan Sha'Rim will explain that the City of a Thousand Floods is right beneath Ark itself. The Grandmaster will tell you to get the Word of the Dead and the Numinos container from Archmagister Lexil Merrâyil at the Beacon, then meet him at the entrance of the Undercity. As you arrive at the Beacon however, things start to go wrong. First, a couple of Keepers will become possessed by the High Ones, attacking you. After that, however, something much worse: The Nehrimese have breached Ark.
Commander Leora Eren will arrive and explain that the Truchessa and a third of the Keepers have followed Signet Leader Jorek Bartarr's example, and opened Ark's gates to Coarek. Follow the quest marker towards one of the traitors, and you'll learn that Natara offered Ark in exchange for peace, but Coarek betrayed the Truchessa and killed her as soon as the gates were open. Tealor decides that the only prudent course of action is to light the Beacon before Coarek can reach it and destroy it, then surrender.
After Tealor's speech, find him on the Grandmaster's Rooms, in the Emporium, where he will explain that The Order has a set of hidden tunnels into the Undercity, which would have been used to dispense poisonous gas in case of a revolt. He tells you to meet him and Yuslan there, with your companion. This quest will then end, and The Shards of Order, Part I will begin.


