Enderal:Scorpion and Lion
 |
Scorpion and Lion (NQ_G_07Dijaam, NQ_G_07Mael) |
| Location(s): | The False Dog, Ark, Crypt, Barrack Quarter, Ark, Prison, Perpetuum Theater |
| Prerequisite Quest: | The Last Stone |
| Rewards: | One of the following:
|
| Difficulty: |
| Spoilers | |
| “Spoilers ahead!” | |
| The following page or section contains major plot spoilers! Do not continue reading if you don't want to see spoilers. |
Detailed Walkthrough



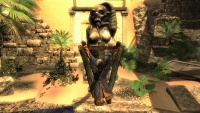
Siding with Dijaam
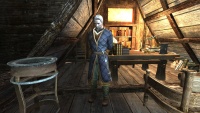
This quest will begin automatically after you read the Message of the Sickle in the Petrified hideout. Return to Dijaam in The False Dog and report your findings. She quickly comes up with a plan and tells you to meet her in front of the Golden Sickle's Trading Post. As you arrive there however, there's no sign of Dijaam or Maél. Enter the trading post, and you'll soon know why.
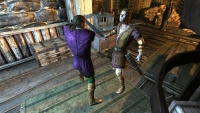
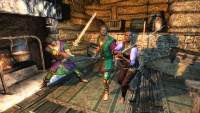
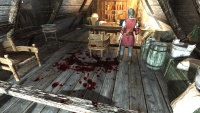
Dijaam is already inside the trading post, with two of her men. She has taken the workers hostage, and refuses to let any of them go until the Green Scarabeus is in her possession and Maél Dal'Loran is begging at her knees. You can try to defuse the situation, but Mazeto gets fed up, draws his sword, and begins to approach Dijaam, ignoring her increasingly desperate attempts to get him to stop. As Mazeto reaches striking distance, one of Dijaam's mercenaries steps forward in turn and decapitates him in front of everyone. That lights the power keg, and a generalized fight begins, as the workers attack you and Dijaam.
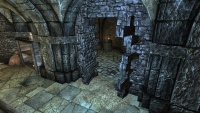
After the fight, only you and Dijaam will be left alive. She is visibly concerned about the bloodbath, as that was not her plan. She suggests that both of you find a way out that isn't through the front door. No one knows that you were involved, so you'll be able to escape with your name unscathed that way. Search around and you'll find a stairway leading under the floor, and a trapdoor that leads to Ark, Crypt: your escape route. The crypt is crawling with Lost Ones and has many winding paths, but you'll be able to find a door to the Barrack Quarter by following the quest marker.
The Prison
After leaving, however, your way will be blocked by guards on all sides. After discussing your options, Dijaam decides to turn herself in in order to let you escape, with the condition that you should help her break out of prison before she's executed. She tells you to go back to the crypt and lay low until all the guards dissipate, then find another way out. Make your way through the lost ones and you'll find another exit, to the Undercity's Corpse Pit.
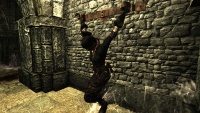
Enter Ark's Prison through the Barracks Quarter, and you'll be confronted by a guard. You can pass an 40 Rhetoric check or bribe him for 300 Pennies to get through to Dijaam's cell. If you pass through the rhetoric check, you can find the key to her cell on a shelf near the door. If you bribe the guard, he will automatically unlock the door for you. Get through the door, and you'll find Dijaam, shackled to a wall and covered in blood.
Talking to her, you'll find out that Maél was kidnapped during the incident in the trading post, and the guards believe that Dijaam is responsible. Before you can continue your conversation to figure out what's going on, a magical explosion occurs and materializes a small bag onto the floor. Open the bag, and you'll find the Key for Dijaam's Onêlys' Handcuffs and a Letter from the Mysterious Pouch. The letter seems to indicate that neither Dijaam nor Maél were behind the strange occurrences surrounding the Green Scarabeaus. The mastermind invites you to the Perpetuum Theater to witness the final stage of the show.
You can find the lever mentioned in the letter on the bottom floor right next to the hallway that leads upstairs. Despite Dijaam telling you to not be noticed, there are no guards on the area, so you don't have to worry about sneaking. As soon as you pull down the lever, you'll hear two men talking on the floor above. Oolan, one of the elders of the Blue Islands Coalition, is explaining to a protector of the Golden Sick that Dijaam may be tried by Endralean laws, as her actions do not represent the Coalition, and that the Kiléans are ready to pay an extra ten thousand Pennies should the idol be recovered. It seems that the Dijaam has been left behind by her comrades.
The Theater
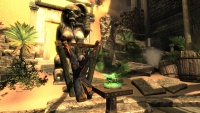
Continue forward and you'll find an opening in a wall that leads to a trapdoor to the Sewer. Make your way through the beasts below and you'll end on the House of Actors, then on the Prop Room, and finally, on the Perpetuum Theater's Stage. As you enter the stage of the final act, you'll find Máel, shackled in front of his beloved Green Scarabeaus. As Dijaam starts walking towards him, a powerful explosion knocks her unconscious, and the writer and director of this foul play finally comes into light: Mendelus Pennypouches.
Mendelus reveals that he was the one behind it all: The caravan ambush, the stolen idol, Maél's kidnapping, and Dijaam's imprisonment. According to him, all merchant guilds are nothing but selfish and greedy organizations, who don't care about who they have to step on to get some money. Mendelus intends to “expose” the Golden Sickle and the Blue Islands Coalition for what they really are by painting the stage with the blood of the three actors. You can try to convince him with a rhetoric check, but it is clear from his eyes that the Red Madness has already taken complete control of him. He orders his two hired Petrified, Alyx and Devra, to attack you. After they fall in battle, Mendelus attacks you personally, only to suffer the same fate.
Search Devra's body and you'll find the Remedy for the Ascetic's Woe Potion. Give it to Dijaam and she'll wake up, still a bit dazed. Now, you'll have a choice: You can either take the idol before the guards arrive, or stay and tell the truth about Mendelus and his wicked plot.
Taking the Idol
If you choose to take the idol, Dijaam will travel with you to a hideout near the shoreline. After a brief talk, you can decide what to do with the idol, and, if you have more than 25 Sympathy with her and have flirted at least once, you'll have an intimate moment. If you didn't choose to split the profits, or if you select any option that lets Dijaam leave, she will flee with the idol, leaving only a mere Coin Pouch (worth 37 Pennies), a letter of apology, and her sword the Stinger of the Blue Island.
If you chose to split the profits and you then choose to not let Dijaam get away, however, she will turn hostile and attack you. There is no way to avoid this conflict, even if you have high sympathy with her. After she falls to battle, take the Green Scarabeaus and remember to loot her sword! This will grant you the "Worth It" Steam achievement. Locate any of the fences throughout Ark to try to sell the idol, although the Undercity is the place with the most fencers (one in particular is always at The False Dog). Despite the artifact's value, the inability to sell it through normal channels means that the fencer can only offer 400 Pennies for it. A rhetoric check can increase this amount to 600 pennies. Accept the offer and you'll receive the Bank Vault Key "1212", and this quest will end. Both endings will grant you 2500 XP.
After an in-game day, you'll find a bag at the Vault 1212 on the Bank with 450 Pennies, Vagrant's Ode, and a letter.
Telling the Truth
If you choose to stay and tell the guard what happened, Dijaam will attack you and you'll be forced to kill her. There is no way to avoid this, even if you have a high sympathy with her. After she dies, Commander Leora Eren will show up, and it is implied that you've told her the truth about everything that happened. The commander thanks you for your honesty, and gives you the Bank Vault Key "1112", saying that “by tomorrow, you will find compensation at the bank, I will see to it“. The quest will end and rewards you with 2500 xp.
After an in-game day, you'll find a bag on the Vault 1112 of the Bank, containing 600 Pennies.
Siding with Maél
This quest will begin automatically after you read the Message on the Petrified hideout. As you report back to Maél on the Golden Sickle's Guildhouse, a courier comes running in with dire news: The Trading post has been attacked by the Blue Islands Coalition, and the workers have been taken hostage. Maél orders the guards to not let anyone out of the city, in case this is a diversion, and then asks you to go to the trading post and stop the raid. Since the front door is blocked, you'll have to go in through Ark's Crypt.
The Crypt is crawling with Lost Ones and has many winding paths, but they all eventually converge on the exit to the trading post. There, you'll find three Kiléan mercenaries, who will attack you on sight. After the fight, Rogash, the only worker left, will come and tell you that Dijaam Onêlys wanted to use the trading post as a “bargaining chip” so she could get her money back from Maél, but everything turned into a blodbath when Gunam started throwing insults. Dijaam apparently fled, unnoticed.
The Kidnapping
Make your way back to the guildhouse to report your findings to Maél. As you arrive there, you'll find Commander Leora Eren, next to a big pool of blood. The Commander initially suspects your well-timed coming, but another protector quickly comes in and vouches for your innocence. Apparently, Maél has disappeared and Dijaam has been caught and imprisoned while you were dealing with the trading post. The commander suggests that you interrogate Onêlys at the prison to find out what she knows about Maél's disappearance.
As you enter the prison, a guard will give you the key to Dijaam's cell. No matter what you say, she will deny any involvement with the ambush. She says that she sent her men to follow you, and you killed them when they discovered you were linked to the assassins. You can show her the letter you found in the hideout, but she denies writing or ever seeing it. Before you can find out more about what's going on, whoever, Oolan and Wuulas interrupt your conversation, asking you to forgive them for Dijaam's actions. Wuulas stays behind to watch Onêlys, while Oolan asks for you two to talk in a more secluded location.
Follow Oolan downstairs, and he'll tell you that Dijaam had a firm conviction that Maél was the one behind the ambush. Before more can be said, however, Dijaam causes a flash a light to occur, knocking Oolan unconscious. Go back to Dijaam's cell and you'll find Wuulas dead, next to the Letter from the Mysterious Pouch, which indicates that someone freed her. The letter invites the reader to the Perpetuum Theater for the final act of the “play”, and also mentions that a lever will open the way.
The Theater
Make you way downstairs and you'll find the aforementioned lever on the wall, right next to the doorway that leads upstairs. As you enter the stage of the final act, you'll find Máel, shackled as the center piece, and Dijaam among the audience seats. After a brief talk with her, the writer and director of this foul play finally comes into light: Mendelus Pennypouches.
Mendelus reveals that he was the one behind it all: The caravan ambush, the stolen idol, Maél's kidnapping, and Dijaam's imprisonment. According to him, all merchant guilds are nothing but selfish and greedy organizations, who don't care about who they have to step on to get some money. Mendelus intends to “expose” the Golden Sickle and the Blue Islands Coalition for what they really are by painting the stage with the blood of the three actors. You can try to convince him with a rhetoric check, but it is clear from his eyes that the Red Madness has already taken complete control of him. He orders his two hired Petrified, Alyx and Devra, to attack you. After one opponent goes down in battle, Mendelus attacks you personally, only to suffer the same fate.
Search Devra's body and you'll find the Remedy for the Ascetic's Woe Potion.
Give it to Maél - Explain to him what has happened ever since he was kidnapped. After talk about the situation, he thanks you for what you've done and tells you to meet him back at the Guildhouse. When you go back, he'll reward you with 600 Pennies and, if you returned Rodas' Amulet before, he will give it to you, saying that now you deserve the same respect he had for Rodas. You can choose what to do with Dijaam: Let her be tried by Endralean law, or let her go with the Kiléans. Either way, it seems that the poison used by Mendelus will have permanent effects on her mind. In the end, the contract between the Sickle and the Coalition was maintained, and the idol was sold without a problem. And with that, the quest ends, and so does the Golden Sickle questline.
Notes on Devra and Alyx Fight Mechanics
This is one of the hardest and longest fights in the game so make sure you are prepared. Devra is melee with a two handed battle axe. Alyx is a shock mage, shock resistance gear is recommended. You must fight both at the same time, alternating. Focusing on one opponent exclusively will not work. When the first opponent goes down on a knee and their shield is up, attack the second opponent. If you are melee, it is best to group both into an area so that you can switch back and forth easily without running across the room. If you are a ranged fighter, there is a ledge with barrels in the back of the theater that can be utilized. Occassionaly, Devra will sheath her battleaxe and approach in battle stance unarmed for a cycle or more. You will receive a message in the top left corner when shields are at 75%, 50% and 25% for each of the opponents. The fight should wrap up at approximately 20 kneebends from both Devra and Alyx. Mendelus Pennypouches will enter the fight after the first opponent goes down.
Trivia
- After the quest, Ofelio will appear in the Golden Sickle's Trading Post and succeed Mendelus Pennypouches as new quartermaster. The Prophet can trade with him just like before.
- In order to obtain the best possible reward for this quest, you should side with Dijaam, take the idol, then insist on selling it and splitting the profits. With a high enough Rhetoric, you can obtain the same 600 pennies as you would get if you were to side with Maél, but with the extra items Stinger of the Blue Island and Vagrant's Ode. Additionally, this choice lets you keep Rodas' Amulet of the Golden Sickle if you picked it up and kept it from Maél during the Golden Sickle questline. This choice grants you the "Worth it" Steam achievement.
- If you finish this quest on the side of Maél, then upon entering House of the Apothecarii, you might hear two apothecarii talking about how he donated them a whole 50 thousand pennies
